TUTORIAL
- 1 - Introduction to Cosima (0.9b)
- 2 - Installation of Cosima, IrfanView and customizing Windows Explorer
- 3 - The short story - quick start tutorial
- 4 - Running Cosima and some special recipes
- 5 - Recipes - specifications and downloads
- 6 - Adjusting parameters - making your own recipes
- 7 - IrfanView tips
2 - Installation of Cosima, IrfanView and customizing Windows Explorer
by Jørn Lang
- 2.1 Installing IrfanView
- 2.2 Installing IrfanView plugins
- 2.3 Installing Cosima
- 2.4 Customizing Windows Explorer
- 2.5 Download test images and 5 recipes
- 2.6 You are now ready to see cosima in action :-)
This tutorial is made using Windows XP, Windows Explorer and IrfanView in addition to Cosima. For details of system requirements see: Which operation systems will be supported?
The appearance of the screen shots in the tutorials may differ from what you see on your computer, but the contents should be similar.
2.1 Installing IrfanView
To follow these Cosima tutorials, it is essential that you install the awarded and free* image-viewer and converter IrfanView on your system. IrfanView is needed for using Cosima with JPGs and TIFs. Otherwise you can run Cosima with TGA-files only.
*IrfanView is free for private use.If you have IrfanView on your machine already, check that the path is "c:\program files\irfanview\i_view32.exe". Otherwise you must either un-install, and then re-install as described here, or insert your current path of IrfanView in all the ini-files you wish to download. (See: 6 - Adjusting parameters - making your own recipes).
The latest version of IrfanView can be downloaded here http://www.tucows.com/preview/194967.
Click the download button for your operating system.
Next, choose a download server. (Not illustrated).
You will see this window:
Close any other open windows.
Choose "Run".
If you chose "Save", double-click file: "iview398.exe" after saving.
In the next window click "Run" to install.
In this next window, type exactly, or copy and paste from the next line into the field: "Destination folder"
C:\Program Files\IrfanView
Click "Next".
In the next window (not shown here) you may choose file-types to be associated with IrfanView. (Checked file-types will always be opened by IrfanView - not needed now, and can also be set at any time later: 7 - IrfanView tips.
Click "Next", review your settings and click "Next" again.
2.2 Installing IrfanView plugins
It is also strongly recommended that you download and install the essential plug-in for IrfanView, following about the same procedure as above (but shorter): http://www.tucows.com/preview/415586. (This is not needed for running JPGs or TIFs, but offers support for more file-types and also inlcudes the smart JPG lossless rotation for rotating JPGs without re-compressing like most other programs do, 7 - IrfanView tips).
2.3 Installing Cosima
- Download setup_cosima_09b.exe to your PC, or choose "Run". If you chose "Save", double-click setup_cosima_09b.exe.
- Follow the instructions in the setup-wizard.
- In the "Select Additional Tasks"-window, select "Create a Send to short cut" to cosima.exe. The two other options are not used during this tutorial and can be set as you prefere.
-
In this tutorial we will use "drag and drop" start only.
If you would like to learn about other start options, see the online help or post a question to the yahoo groups discussion pages.
The appearing text *** Your very first steps with Cosima *** (first_steps.txt) will give you a condensed introduction and can also be found in the ...\Cosima\doc\ folder.
Close the text window.
Cosima is now installed :-)
You should find cosima.exe and cosima.ini located in C:\Cosima if you chose the default location. See next screen shot. (If the Windows Explorer was open during the installation, you might have to choose "refresh" from Explorers "View" menu.)
2.4 Customizing Windows Explorer
You might need to customize Explorer to show file endings and the address bar. Right-click the toolbar and select "Address Bar". Unlock the toolbar if you need to move the addressbar to make it visible. Finish by right-clicking and locking the toolbar.
Next, go to the Tools menu > Folder Options... and follow the steps 1 to 4 in the screen shot shown below.
- Check "Display the full path in the address bar".
- Un-check "Hide extensions for known file types".
- Click "Apply to all folders".
- Click "Apply".
2.5 Download test images and 5 recipes
Download the zip-file 09b_cosima_tutorial_files_1.zip (2.7MB) with some example images. This zip-file contains the following recipes (they are also individually linked for separate download):
- 09b_scanned images_fullsize left right+pair+bw-anaglyph out.ini
- 09b_single digi-cam l-r in_fullsize left right+pair+bw-anaglyph out.ini
- 09b_double-cam jpg_fullsize left right+pair+bw-anaglyph out.ini
- 09b_inter-change.ini
- 09b_cosima_default.ini
and 5 cha-cha pairs for mounting:
- left-right-single-cam, 2 jpg-pairs
- up+down-cam jpg, 1 jpg-pair
- skanned tga+jpg, 1 jpg-pair and one tga-pair.
Extract all the files into your Cosima folder.
You can also download the package of 1 TGA pair Hummel.zip (2,11MB).
The expanded view of the Cosima folder will be something like this, double-cam images will be in the "l" and "r" folders.
2.6 You are now ready to see cosima in action :-)
Next section: 3 - The short story - quick start tutorial
Back to the Cosima homepage: www.herbig-3d.de/cosima/
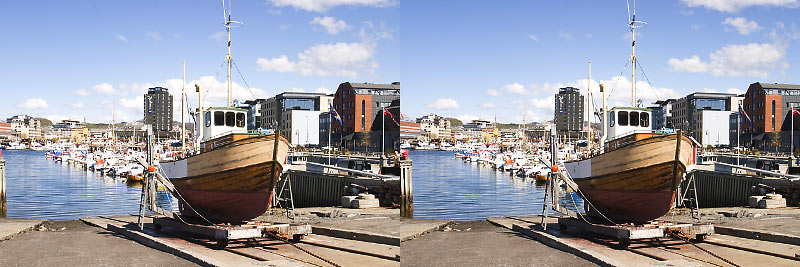
Bodø harbour, photo by Jørn Lang.